Aluminium Fuel Tank
AIM:
The idea of this exercise was to team up into groups whereby we evenly spilt up the formation of an aluminium fuel tank to scale using the RHINO digital modelling software that allowed us to print a concept of the subject at hand to reflect all the curves, crests and lines of the fuel tank. This was followed by the formation of a third of the fuel tank using sheet aluminium.
The modelling process involved cutouts of the stencils printed that joined together to form a replica of the fuel tank which was later used as a starting point for the formation of the aluminium.To reduce flimsiness of the 3D model a hot glue gun for all the junctions and joints of the components to ensure a rigid structure for the formation of the tank.


The formation and moulding process was an intricate process that utilised many techniques and equipment to allow for the true representation of this model.
The component assigned to myself involved the bending, moulding, and shaping of the aluminium to represent the front and side of the fuel tank
In order to allocate each of these components, certain reference points of the fuel tank were measured and projected on a sheet of aluminium, whereby the components were cut using a pair of tin snips
PROCESS
The method used for the formation of the side component of the fuel tank involved the following
Step 1
1. Tracing paper used to replicate shape and size of each component


Step 2
The stencils were then translated onto the sheet of aluminium then the components cut


Step 3
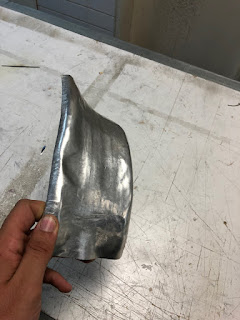
The English wheel was then used to give shape to the aluminium cutout and the formation process had begun with regular checks against the concept tank produced
3.


Step 4
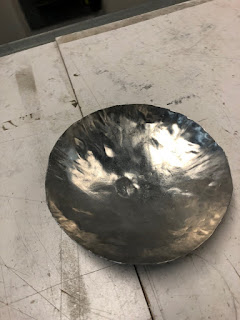
Once the aluminium had taken the shape of the tank, a mallet was used as illustrated below to create the various curves and lines of the tank as well as fine tuning the shape of the tank and to shrink the top of the tank from the stretching caused by the English wheel along the curves marked on the aluminium, which was used as a guideline to show where the curves where in relation to the replica tank produced.

Step 5
5. Following regular checks and small alterations to certain parts of the aluminium, particularly, shrinking the aluminium as a result of constant rolling to create such a round shape, the tank finally takes shape and sits snug on the Rhino model created at the start of the project.


Comments
Post a Comment